Case Search Widget
Overview
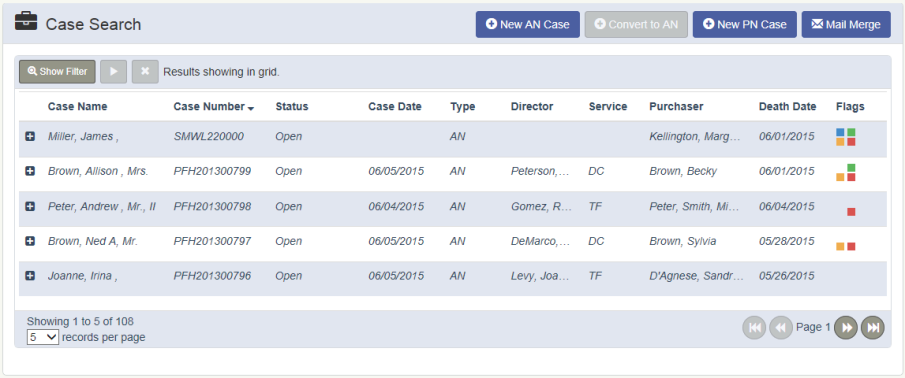
The Case Search screen displays a list of all Cases in the application. When you first log into MIS Professional the default results show the most recent At Need and Open cases. This list can be filtered by any of the columns showing on screen by clicking the Show Filter button.
You can also create a New At Need case by clicking the "New Case" button or Convert an Uploaded Preneed case to At Need by clicking the "Convert to AN" button.
Work Flow
To Add a new At Need Case:
- Click the "New AN Case" button on the Case Search widget
- The First Call screen open, enter required fields:
- Required Fields: Facility, Call Taken, Decedent
- Click Save at the bottom of the screen
To Add a new Pre Need Case:
- Click the "New PN Case" button on the Case Search widget
- The "New Pre Need Case" screen opens
- Fill in the required fields
- Note that the Contract type fields (Template, Option, Sales Type, Etc) are NOT required.
- The contract for the case can be created at a later date, It doesn't need to be created at the time of the Pre Need case creation.
- Click Save
To Search for a particular case or group of cases:
- Click the Show Filter Button
- Click the X to clear default filter criteria
- You can search for cases by any of the fields showing: Case Number, Case Name, Case Type, etc.
- Click the Play button to initialize the search
To Create an At Need case from a Pre Need case:
- Click the "Convert to AN" button at the top of the Case Search widget
- Click YES to the "Convert to AN" confirmation message prompt
- The "PN Go AN" screen appears, fill in the Required fields:
See the Convert PN to AN topic for more details on this process.
Additional Details:
The video below shows a brief example of the functionality on the Case Search widget: